
Part 4 - Cars and Trucks CAL - Dump Truck Tray and Wheels

Introduction
In this part you will be making the wheels and dump truck tray to finish off the vehicle. There are two options for the tray at the back. You can either choose to make a fixed tray or you can have a tipping tray that opens up. If you are making the fixed tray you will not need the button or domes listed in the notions in part 3.
Social Media
Facebook: This CAL is being hosted on Facebook by the CAL - Crochet A Long group. Join the CAL - Crochet A Long on Facebook if you have any questions or to post progress photos
Instagram: If you are on Instagram, you can find me HERE. Please add your photos to Instagram using #carsandtruckscal2020
Size and Gauge
Size: Length 11 cm (4.3”), height 6.5 cm (2.6”), width 5 cm (2”)
Gauge: 11 stitches and 12 rows = 5 cm in sc
General instructions
See here
Notions etc
See part 3
Instructions
Dump truck tray
There are 2 options for the back of the truck. If you want something static then make option 1. If you would like the back to tip and open like a dump truck then choose option 2.
Option 1 - static tray

Using colour B yarn ch 11
|
Row 1 Sc in the 2nd ch from hook and sc in each ch across, ch 1 and turn. (10) |
 |
|
Rows 2-11 Sc in each st across, ch 1 and turn. (10) |
 |
|
Row 12 Sc in each st across. (10) |
 |
|
Row 13 Ch 1, turn slightly to sc in the side of the rows. *2 Sc in the side of the first row, 1 sc in each of the next 10 rows, 2 sc in the side of the last row. Ch 1, 2 sc in the next st, sc in the next 8 sts, 2 sc in the last sc ch 1* repeat from * to *. Sl st into the first st. (14 sc per long side, 12 sc per short side, 4 ch 1 sp)
Continue working in rounds.
|
|
|
Rnd 14 Working in BLO, ch 1, skipping the ch 1 spaces in the corners, hdc in every st round. Join to the first st with a sl st. (12 hdc per short side, 14 hdc per long side) |
 |
|
Rnd 15 Ch 1, sk 1st st *(FPhdc around the next st, BPhdc around the next st) 6 times, [sc2tog] 2 times, sc in the next 6 sts, [sc2tog] 2 times*. Repeat from * to *, join to first st with a sl st. (12 FPhdc, 12 BPhdc, 8 sc2tog, 12 sc) |
 |
|
Rnds 16-17 Ch 1, [FPhdc around the next st, BPhdc around the next st] 6 times, sc in the next 10 sts, [FPhdc around the next st, BPhdc around the next st] 6 times, sc in the next 10 sts, join to first st with a sl st. Fasten off leaving a long tail to sew tray onto the back of the truck. (12 FPhdc, 12 BPhdc, 20 sc) |
 |


Option 2 - movable dump truck tray


|
Using colour B yarn, ch 11 and complete Rows 1-13 as for the static tray. (14 sc per long side, 12 sc per short side, 4 ch 1 sp) |
 |
|
Rnd 14 Ch 1, working in BLO and starting on the long side, skipping the ch 1 at each corner, hdc in each st on 3 sides, finishing at the end of the 2nd long side, ch 1 and turn. (14 hdc per long side, 12 hdc on the short side) |
 |
|
Rnd 15 Sc in the first st, [FPhdc around the next st, BPhdc around the next st] 6 times, [sc2tog] 2 times, sc in the next 6 sts, [sc2tog] 2 times, [FPhdc around the next st, BPhdc around the next st] 6 times, sc in the last st, ch 1 and turn. (12 FPhdc, 12 BPhdc, 4 sc2tog, 8 sc) |
 |
|
Rnd 16 Sc in the first st, [FPhdc around the next st, BPhdc around the next st] 6 times, sc in the next 10 sts, [FPhdc around the next st, BPhdc around the next st] 6 times, sc in the last st, ch 1 and turn. (12 FPhdc, 12 BPhdc, 12 sc) |
|
|
Rnd 17 Sl st in the first 14 sts, hdc in the next 8 sts, ch 1, sl st in the next 14 sts, ch 9, sl st in the first sl st to join. Ch 1 and turn. (28 sl st, 8 hdc, 9 ch) |
 |
|
You will now be working short rows into the ch 9 from the end of Rnd 17. Row 18 Hdc in each ch across the short side, ch 1, turn. (9 hdc) Row 19-20 Hdc in each st across, ch 1, turn. (9 hdc) |
 |
|
Rnd 21 Sl st in the first 4 sts, ch 5, sk next st, sl st in the last 4 sts. (5 ch, 8 sl st) Check that your button fits through the buttonhole that you have just created. You can add or subtract chains to make it the size you require. Fasten off leaving a long tail to sew onto the back of the truck. |
 |
|
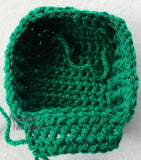
Sew the unworked sts from Rnd 13 of the tip tray to the unworked loops at the top of Rnd 2 of the truck as shown in the photo to the right. |
 |

Sew a shank button onto the rear of the truck around about Rnd 1 in the centre so that you can button the back of the tray using the ch 5 buttonhole from Rnd 21 of the tray.

|
Optional: sew snap fasteners onto the back part of the main truck and to the bottom of one end of the tray (as shown in the photo below) and then sew the other end onto the other end of the base tray. It is not essential to add the snap fasteners but it does keep the tray down firmly when you are not dumping the load from the back. |
|
Wheels (make 4)
You can choose any colour combination for your wheels. I like to add my main cab colour as the centre of my hub cap followed by grey/silver and then use black for the rest of the wheel as that is how some of the trucks I’ve observed in my city are branded to match the rest of their trucks.
Using yarn in colour A make a magic ring
|
Rnd 1 Sc 6 into the magic ring, fasten off joining to first sc with an invisible join. (6) |
 |
|
Rnd 2 With grey yarn join in any st round with a standing sc, sc in the same st. 2 Sc in every other st around. Fasten off, joining to the first sc with an invisible join. (12) |
 |
|
Rnd 3 With black yarn begin with a standing sc in any st around, sc in the same st, sc in the next st. [2 sc in the next st, sc in the next st] 5 times. Join to the first st with a sl st {do not cut your yarn}. (18) |
 |
|
Rnd 4 Ch 1, working in BLO, sc in every st around. Join to the first st with a sl st. (18) |
 |
|
Rnd 5 Ch 1, [Sc2tog, sc in the next st] 6 times. (12) Fasten off joining to the first st with a sl st leaving a long tail for sewing onto the vehicle (and to add in windscreen wipers if desired using any excess yarn from sewing on the wheels). |
 |
|
You do not need to add stuffing to the wheels. Simply secure all the (apart from the final tail which you will use to sew on the wheel) and then use the tails as stuffing. |
|

I would suggest sewing on the rear wheels first and centring them near the end and then lining up the front wheels with the back ones. The photo below shows a finished dump truck. The wheels are not sturdy enough to hang down below the truck like wheels on a normal truck do so you need them to line up with the bottom of the truck base. I usually add the front wheels as close to the front edge slightly below the window (though it may look a little like the wheel goes over the wheel when you’ve sewn it on).

Congratulations, you have now completed your dump truck. Share your photos in the CAL - Crochet A Long on Facebook or on Instagram using the hashtag #carsandtruckscal2020
Other parts:
Part 1 (concrete mixer - vehicle body)
Part 2 (concrete mixer - mixer and wheels)
Part 3 (dump truck - vehicle body)
Part 5 (race car #1)
Part 6 (race car #2)
You can download a print-friendly copy of the full pattern here. Please note that this pattern does not link to Ravelry like some of my other patterns.
While my Cars and Trucks CAL is running you can purchase my "truck and trailer" and "multifunctional tractor" patterns on special. Read more about the patterns here
Copyright Information
This is a FREE pattern, and by using it, you’re agreeing to the following legally-protected conditions.
You’re welcome to sell what you make with it; for online listings, please link back to my website: nessiesnotions.com
Here are the “do nots”:
- Do not resell the pattern, either altered or in its original form.
- Do not copy and paste the pattern onto your own Blog, in a Facebook group, or anywhere else. Simply link to my website instead. Anything beyond this is copyright theft, regardless of what your pattern-sharing buddies tell you.
- Do not pull any of my photos or photos from this pattern to promote yourself or your crochet business on your own Blog, Facebook page, or anywhere else without my permission.